How to make a cat tree
Making a cat tree is fun and easy, as long as you have a few basic DIY skills and tools. The only tools you need are a saw, drill, screwdriver, file and knife. As long as you can use these tools safely then you should get on ok.
Why build a cat tree?
The point of a cat tree is to give your cats something to scratch, climb on and sleep on. It also makes a good place for your cats to hide if they're being pestered by small children! It's very important that you give your cats something to scratch when they're indoors, so that they don't rip up your curtains or sofas but can still wear down their claws.
So, a decent cat tree needs to be built from sturdy materials that can withstand those claws, needs a heavy, solid base so it can't tip over, and must provide places for your cats to sit and rest.
Materials checklist
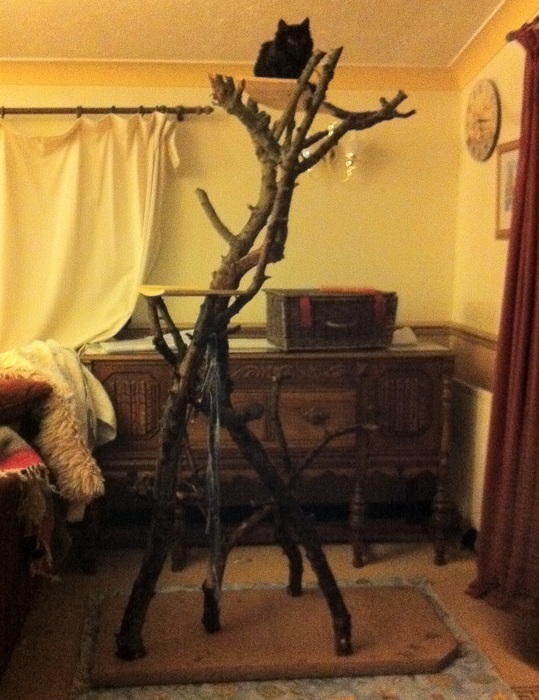
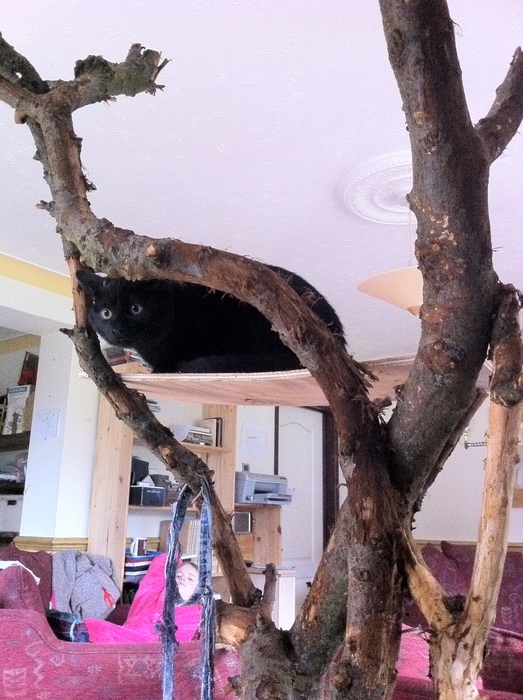
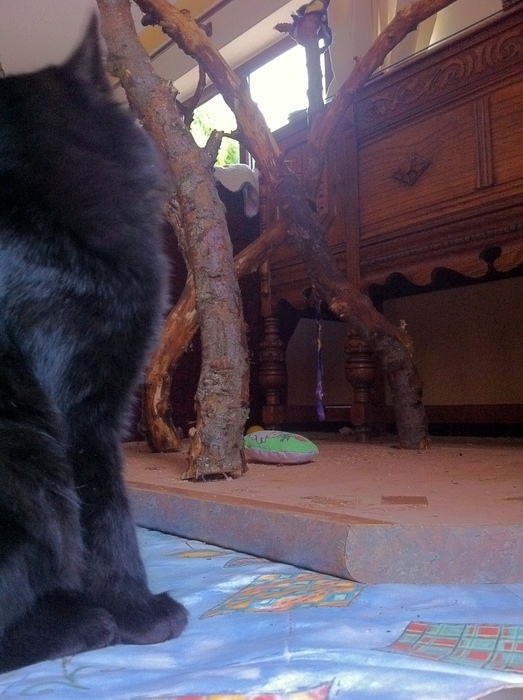
- Tree-like materials. The best thing is to locate a fallen tree on a local footpath. You're only looking for pieces a maximum of 7 feet long, and 2 or 3 inches thick at their thickest part, so these really are just twigs in the grand scheme of things. You could ask a local log supplier if they have any bits of branch going spare. The main thing is that the branches have lots of forks and interesting shapes in them; long straight pieces of pine aren't going to be very interesting, for example.
- A solid base. I used an old piece of kitchen worktop (upside down), as it's extremely heavy and its smooth surface won't damage the lounge carpet when you need to shift the cat tree around. Something like an old wooden door (external) will do the trick too.
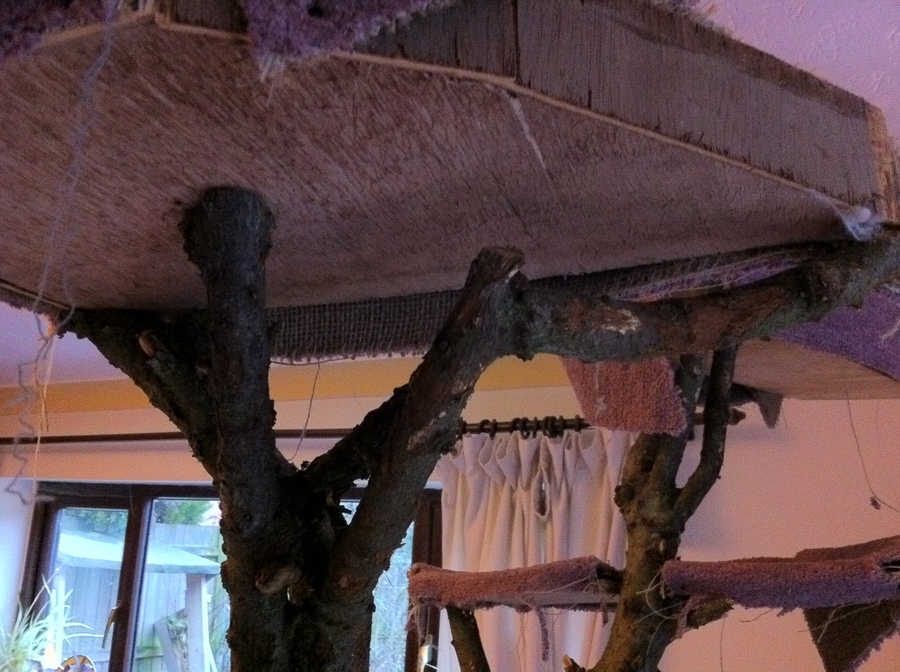
- Small pieces of plywood (or similar) for flat 'sitting areas' in the tree. They need to be around one foot square each, and you'll want three or more depending on the size of your tree.
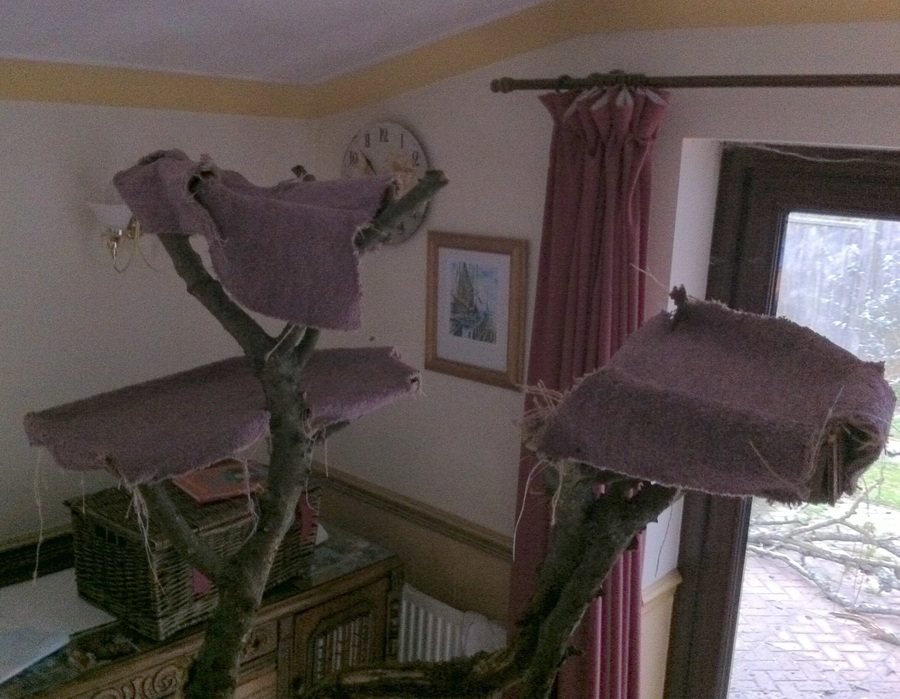
- A piece of old carpet. This is the best stuff for nailing to the flat areas, to give the cats a comfy place to rest.
- Fixings: long screws (eg, 70mm or so, for fixing the branches together and fixing to the base); short screws (eg, 40mm or so, for fixing the plywood sheets to the branches); nails (with flat heads, for fixing the carpet in place).
Make sure you read through all the notes below before starting, and if you aren't sure that you can do it all safely, then don't proceed! Follow these instructions at your own risk, and don't do anything you're unsure about.
Construction steps
- Play with three bits of branch: see how they might rest against each other to support each other and provide places for you to fix the plywood shelves. Spend some time doing this, as it will determine just how interesting your tree is. When you're happy, drill holes where the branches cross each other, and drive screws in. Fix each branch to the base in the same way.
- Take a bit of time to brush the branches down, especially if they're wet and the bark is crumbling.
- Use a file to remove any obvious sharp bits; these are much more apparent where the bark has come away.
- Make sure you can get the cat tree indoors, if it isn't already. You may have to lop off a twig or two!
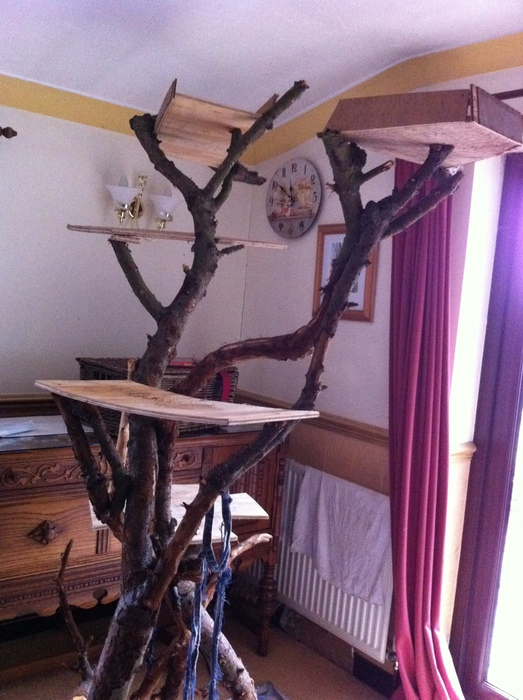
- Decide where the shelves will go, and use a saw to level off any stubs of branch that the shelves could sit on. Cut the shelves to shape, drill pilot holes and screw them in place.
- Cut thin strips of plywood, and fix them (using thin nails or screws) to some of the shelf edges. This will give the cats more than just flat platforms to sit on - making them feel a bit safer.
- Cut bits of carpet to shape, for the shelves. Be very careful when cutting carpet! It's very tough and you'll need firm application of a sharp knife. If you add about 3 inches all round to each piece of carpet, then you'll have plenty of slack to bump it up at the edges and create more of a lip around the edges.
- Sweep up! After all that cutting and filing of branches and carpet, you'll have made quite a mess.
- Use your imagination. You can make all sorts of fun things to hang from (or fix to) the cat tree. How about a rope (or carpet) ladder, for example. Let your cats explore the tree by themselves, and watch them to see how they use it.